As mobile payments continue to grow globally, Apple Pay has become one of the most convenient ways to pay for subscriptions, digital services, mobile apps, and everyday purchases. With Buvei virtual cards—powered by high-approval BINs and instant USDT top-ups—users can seamlessly connect their cards to Apple Pay for fast and secure payments.
This guide walks you through each step of the Apple Pay binding process, explains what information you need, and includes important tips to ensure your card is added successfully.
Why Use Buvei Virtual Cards with Apple Pay?
Buvei offers several advantages that make it ideal for Apple Pay users:
-
Multi-region BIN options (US / UK / HK / SG) for higher approval rates
-
Instant USDT top-ups (TRC20 / ERC20)
-
Fast virtual card issuance for global payments
-
Strong compatibility with subscription services, SaaS, cloud platforms, and digital ads
Once your Buvei virtual card is linked to Apple Pay, you can pay effortlessly using your iPhone, Apple Watch, or Mac.
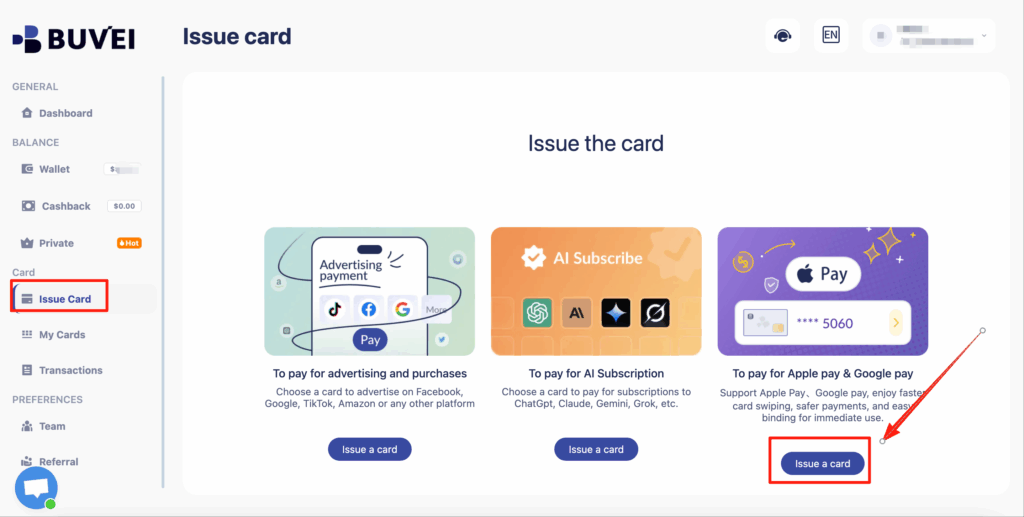
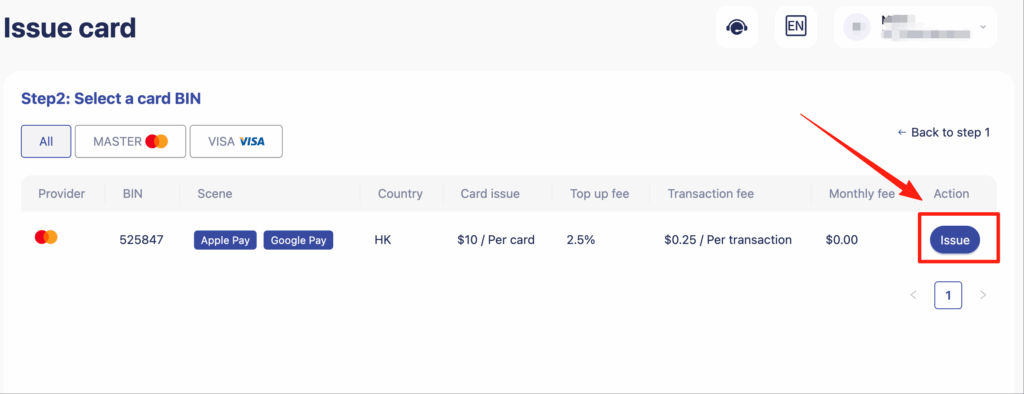
Step 1: Issue a Buvei Virtual Card
From the left navigation menu, go to Issue Card.
Select the card type you want to create—for example, a card intended for Apple Pay usage.
Choose the appropriate BIN region, then click Issue.
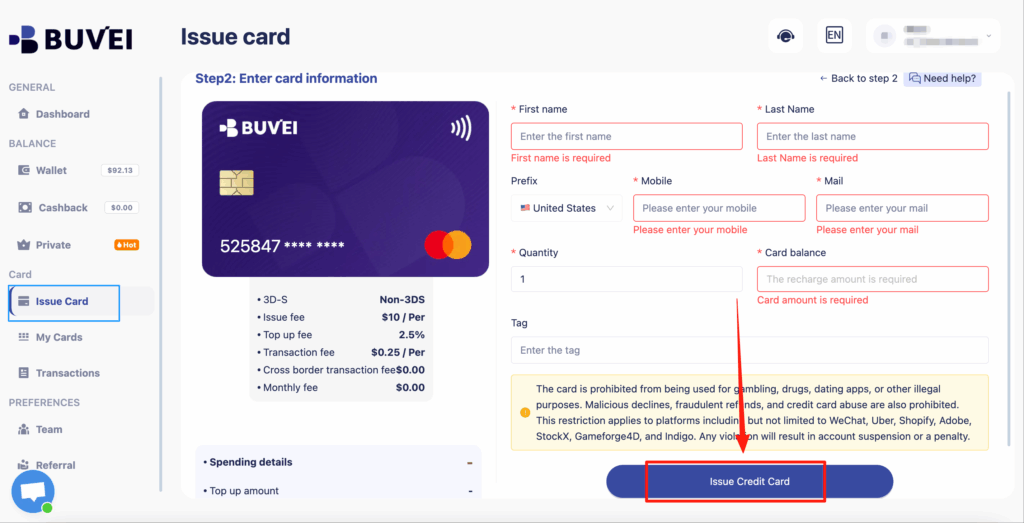
Step 2: Fill in the Card Details
Enter the required information:
-
First Name / Last Name
-
Mobile Number
-
Email Address
-
Initial Top-Up Amount (card balance)
After confirming all details, click Issue Credit Card.
You will be prompted to verify your payment password to finalize issuance.
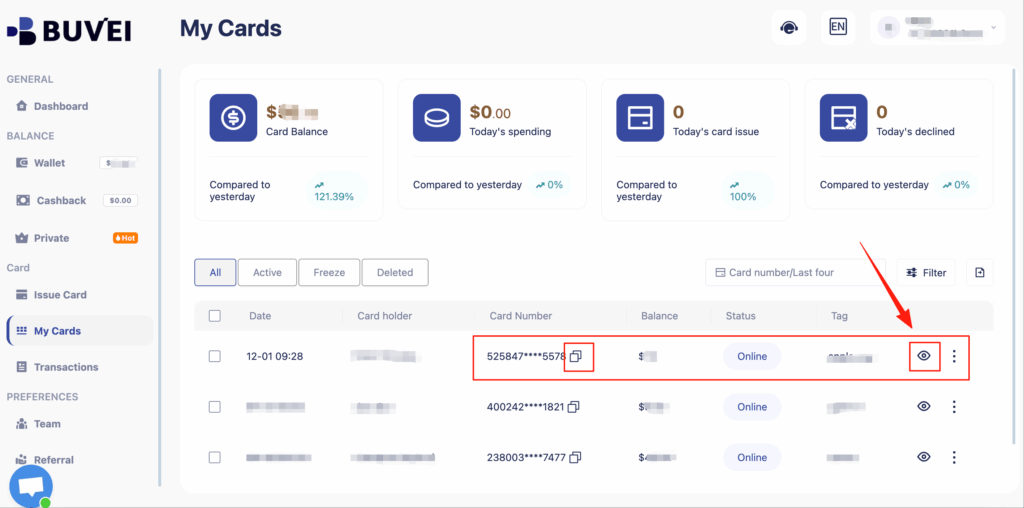
Step 3: View Your Card Information
Go to My Cards and select the newly created card.
Click the eye icon to reveal:
-
Full card number
-
CVV security code
-
Expiry date
You will use this information when adding the card to Apple Pay.
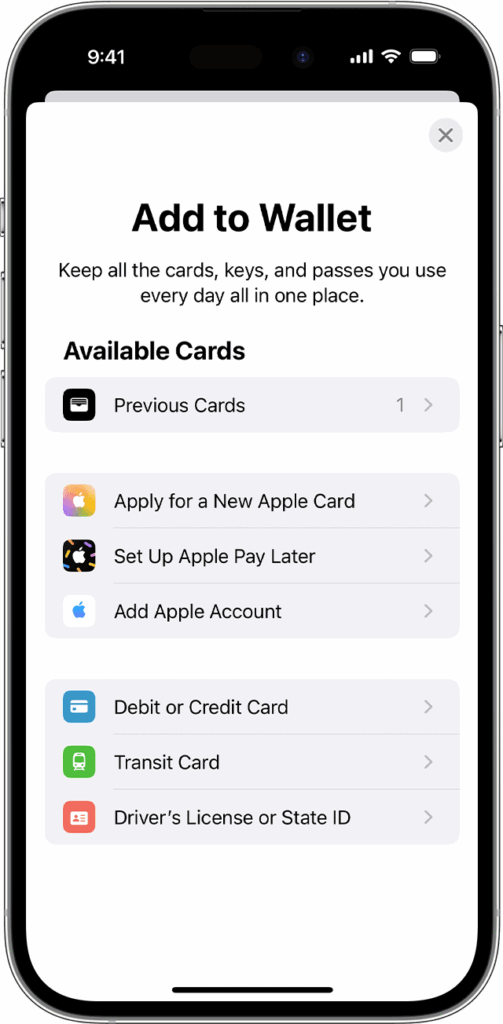
Step 4: Open Apple Wallet
On your iPhone:
-
Open the Wallet app
-
Tap + (Add Card)
Apple Pay will guide you through the setup process.
Step 5: Enter Your Buvei Card Details
Fill in the required information:
-
Cardholder Name (must match the name shown in Buvei)
-
Expiry Date
Tap Next to proceed.
Step 6: Accept Terms & Conditions
Apple will display the issuer’s Terms & Conditions.
Tap Agree to continue.
Step 7: Choose Verification Method
Depending on your BIN and card type, Apple Pay may offer one of the following:
-
Text Message Verification
-
Email Verification
-
(In rare cases) Phone Call Verification
Select your preferred verification method and tap Next to complete the process.
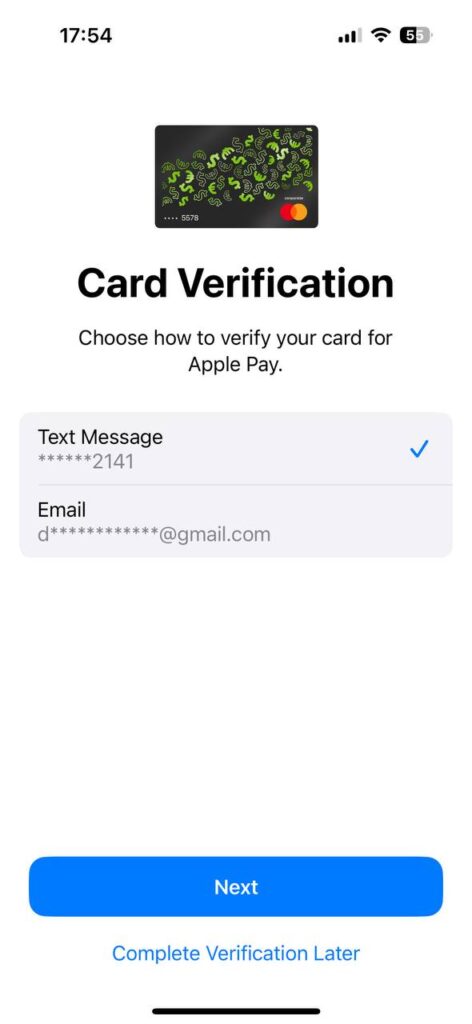
Once verified, your card will be successfully added to Apple Pay.
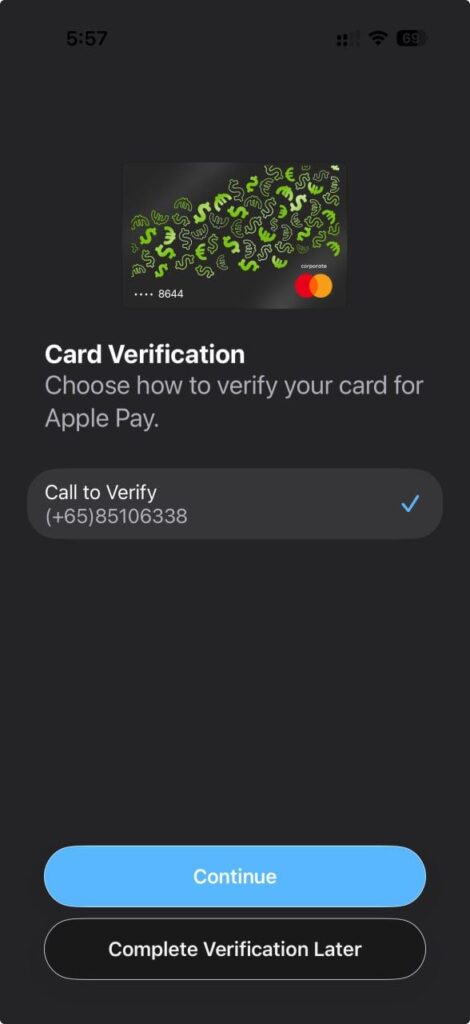
⚠️ Important Notice
If the Apple Pay verification screen only shows “Call to Verify”, this means your card requires manual verification.
Please contact Buvei Support and provide:
-
Your card number
-
A screenshot of the Apple Pay binding page
Our support team will help you complete the verification immediately.
Tips for Successful Apple Pay Binding
-
Ensure your region/BIN matches your Apple ID’s regional settings
-
Double-check your card balance before binding
-
Use a valid billing address format matching the card’s BIN region
-
If adding on Mac, ensure iCloud and Apple Pay are properly synced
-
Restart Wallet app if binding fails on the first attempt
With high approval rates, crypto-based funding, and reliable BIN routing, Buvei is a strong payment solution for both personal and business use.
Conclusion
Linking a Buvei virtual card to Apple Pay is fast, secure, and convenient.
Whether you’re paying for subscriptions, cloud tools, travel services, or global apps, Buvei ensures smooth transactions and stable payment performance.
For further help or BIN recommendations, contact Buvei Support anytime.