Instagram is one of the most powerful platforms for businesses to reach their target audience through advertising. Whether you’re promoting a product, brand, or service, managing payments for your Instagram ad campaigns securely is crucial. In this guide, we will walk you through how to pay for Instagram ads using Buvei virtual cards, providing you with a secure and hassle-free payment method.
Step 1: Log into Your Instagram Ad Account
-
Visit Instagram Ads Manager
-
Open your browser and visit Instagram or directly access the Facebook Ads Manager (Instagram ads are managed through Facebook’s platform).
-
Log in to Your Account
-
-
Use your Instagram credentials to log in. If you don’t have an account, create one first.
-
Step 2: Select Payment Settings
In the Ad Tools page, find and click the “Payment Settings” button.
-
Go to Payment Settings
-
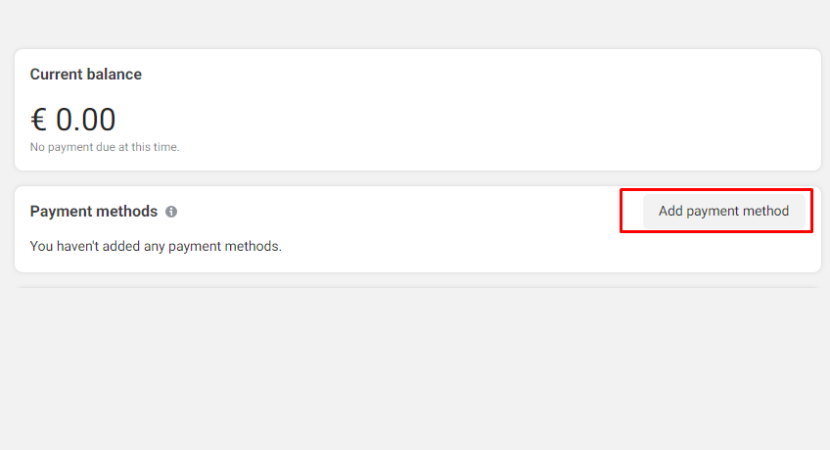
Once your campaign setup is complete, go to the “Billing” section in Ads Manager.

-
-
Add Payment Method
-
Click on “Payment Settings” and select “Add Payment Method.” Choose “Credit/Debit Card” as the option.
-
-
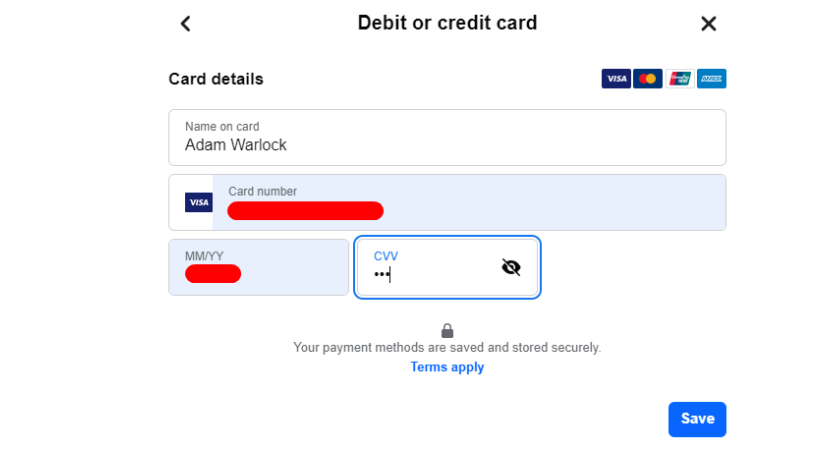
Enter Buvei Virtual Card Details
-
Enter the details of your Buvei virtual card: card number, expiration date, and CVV. Make sure all the details are accurate to avoid errors.
-
-
Verify Your Card
-
Facebook may conduct a small verification charge to confirm the card details. After verification, your Buvei virtual card will be added as a payment method.
-
Two Methods to Set up Payment for Your Instagram Ads
If you want to use your debit card to pay for your Instagram ads, you have two methods of doing so. The first method is to add your card information through your profile settings, which we have already covered in the previous section. The second method allows you to add a payment method directly through a specific post. This method is useful when you want to boost a particular post and need to quickly set up how to pay for Instagram Ads just for that post. To learn the second method, follow our detailed guide in the section below.
How to Pay for Instagram Ads Directly from a Post
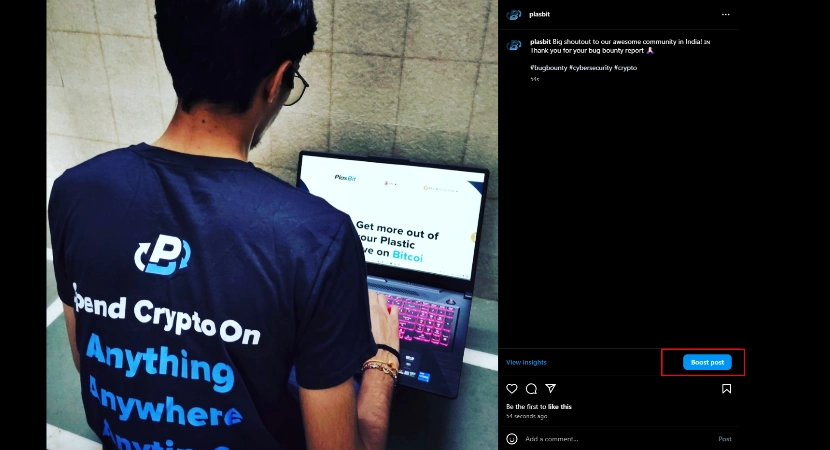
1. Go to Your Account Page and Select the Post You Want to Advertise
- After checking your account type, go to your profile page and click on the specific post you want to boost. This will open the post in full view, giving you the option to adjust and edit your post and also to turn on advertising for that post.
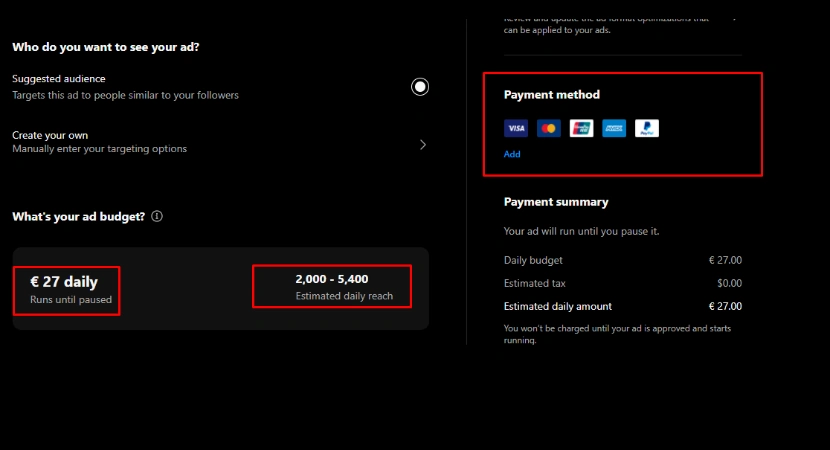
2. Access Payment Method Options
- Once you are in the boost post settings, carefully review the run dates and estimated daily reach, then click the Add button to enter the Payment Method section.
3.Access Payment Method Options
- Once you are in the boost post settings, carefully review the run dates and estimated daily reach, then click the Add button to enter the Payment Method section.
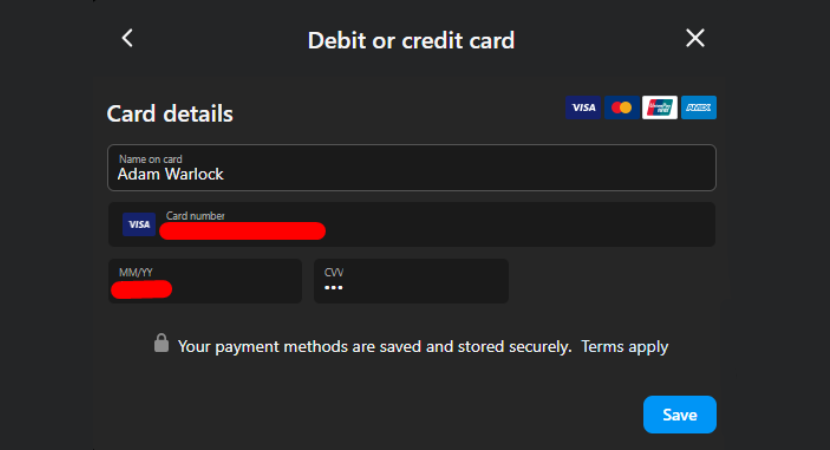
4. Insert Your Buvei Card Details
- Input your Buvei card information, including the card number, expiration date, and CVV code. Double-check and make sure all details are correct to avoid any payment issues. Once you have entered all the necessary information, click Save to use the same payment method for future boosts.
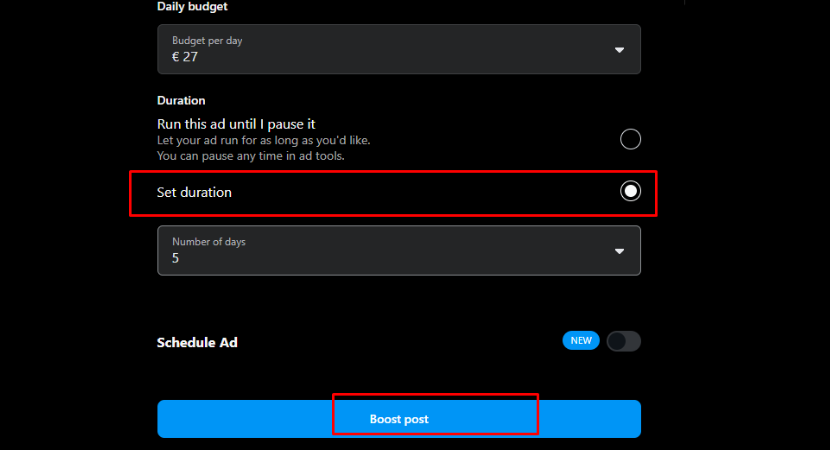
5. Set Boost Duration
- Finally, choose the number of days you want to run this add and click Boost post to finalize your setup.
If you haven't got a Buvei virtual credit card yet, the following steps will help you quickly create your own custom card. Follow the tutorial and get started!
Prepare Your Buvei Virtual Card
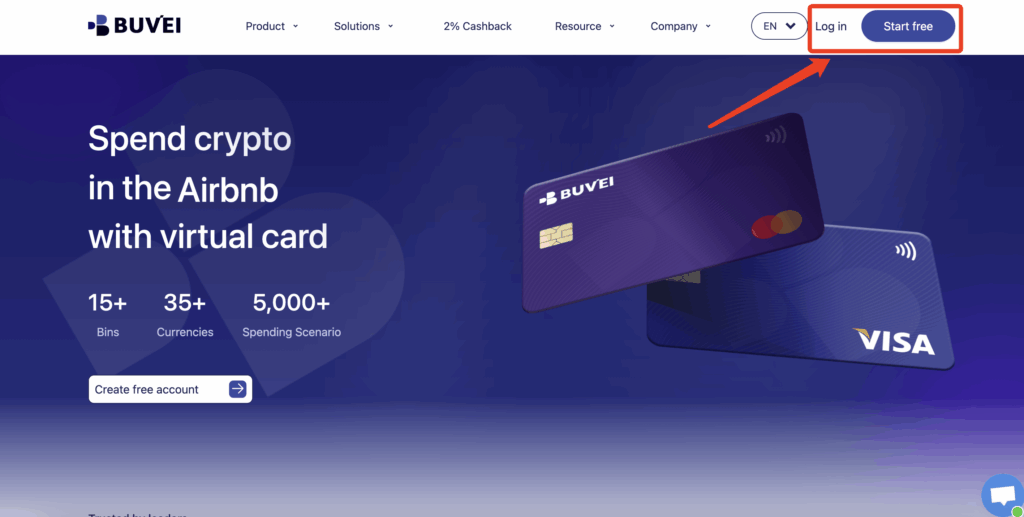
- Log in to your Buvei account and open your Dashboard.
- If you haven’t signed up yet, simply click 'Start Free' to register quickly with your email.
Top up your wallet under the “Wallet” tab
- Choose TRC20 or ERC20 USDT, Use your crypto wallet to send funds
- Wait for the balance to reflect (Note: Make sure the network matches your transfer — TRC20 or ERC20)
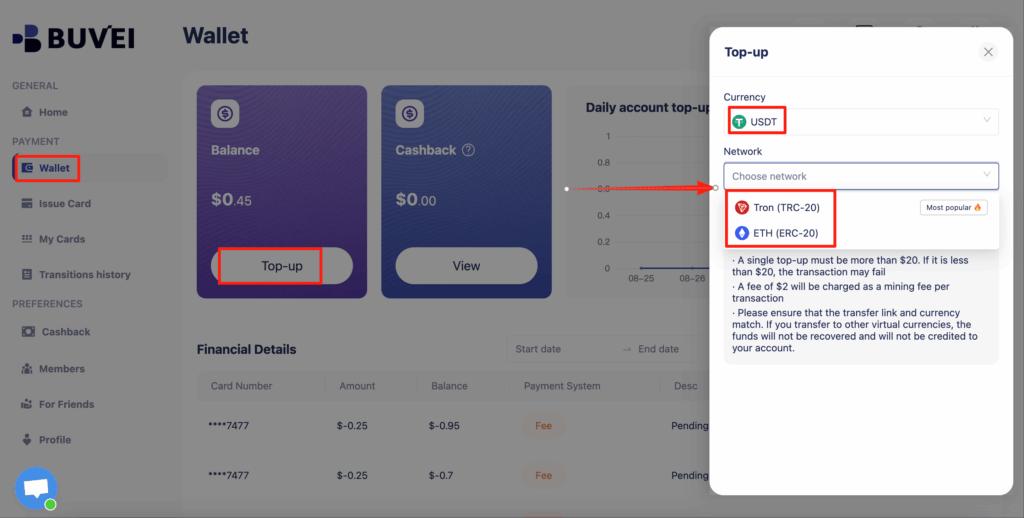
- Recharge successful,Click “Issue card”
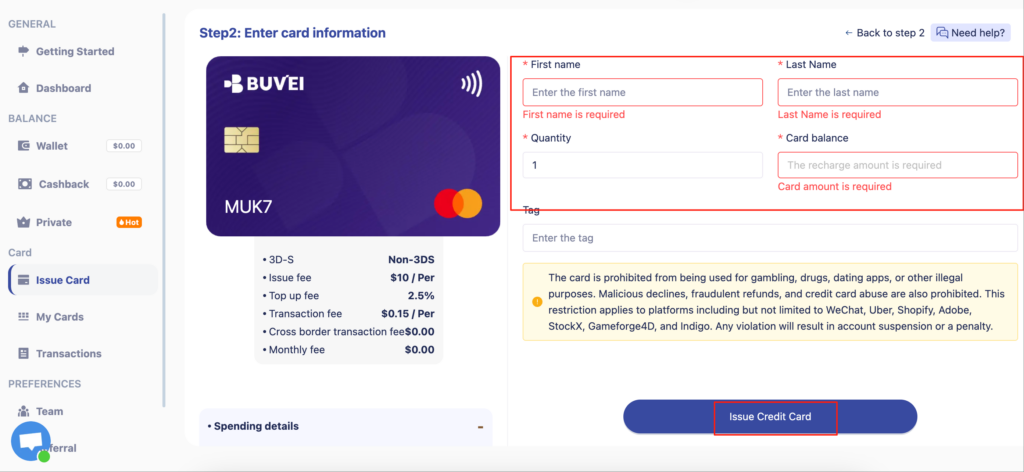
- Choose a card BIN suitable for SaaS payments
- Click Issue and proceed to issue

- card quantity, and desired top-up amount
- Click Issue Credit Card to generate your virtual card
-
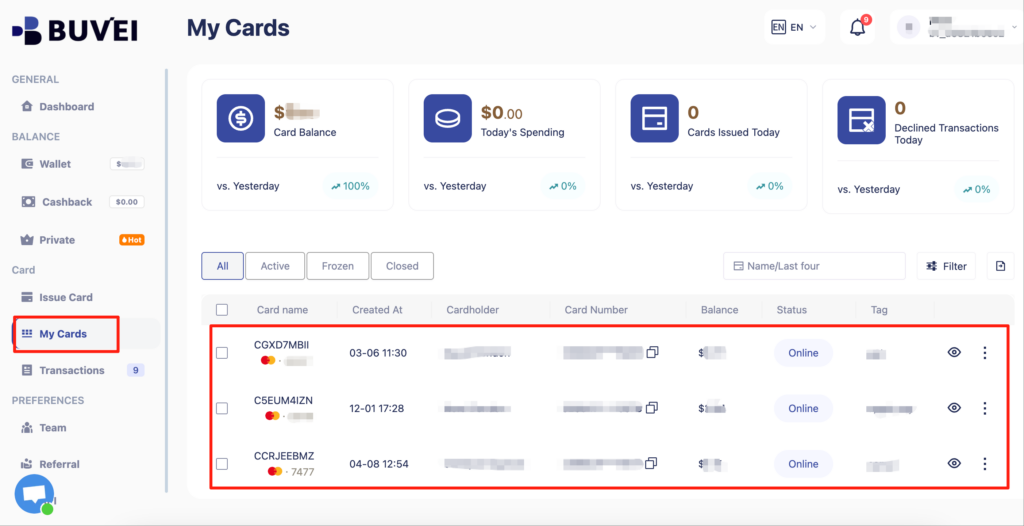
After generating the card, "My Cards" page to view the card details
-
(name, card number, expiry date, CVV).
-
You can also recharge, withdraw, or delete the card at any time.
Why Choose Buvei Virtual Cards for Instagram Ads?
-
Enhanced Security
-
Buvei virtual cards generate unique card numbers for each transaction, providing extra protection for your payments and minimizing the risk of fraud.
-
-
Privacy Protection
-
Your real credit card details are never exposed when using Buvei’s virtual cards, ensuring your financial information remains secure.
-
-
Easy Payment Management
-
Buvei virtual cards allow you to manage your payments more effectively, separating different payment methods for specific services (e.g., using one card for Instagram ads, another for other subscriptions).
-
-
Global Payment Support
-
Buvei virtual cards support multi-currency payments, making it easier for users around the world to pay for Instagram ads without worrying about exchange rates.
-
Get Started with Buvei Virtual Cards for Instagram Ads
Using Buvei virtual cards for Instagram ads provides you with a secure, efficient way to manage your advertising payments. Whether you’re promoting a product or growing your brand, Buvei ensures that your payment information stays safe and your transactions are seamless.
🔗 Sign Up for Buvei Virtual Card and start managing your payments securely today!