__使用蓝白主色调,突出Facebook品牌色__加入箭头或框框强调Ads-Man-1248x702.jpg)
When running Facebook ad campaigns, having a reliable and secure payment method is essential. Buvei virtual credit cards offer a fast, flexible, and controlled solution tailored for digital marketers, helping you bypass traditional credit card restrictions and streamline the ad account verification process.
Here’s a complete walkthrough to connect your Buvei virtual card with your Facebook Ads account:
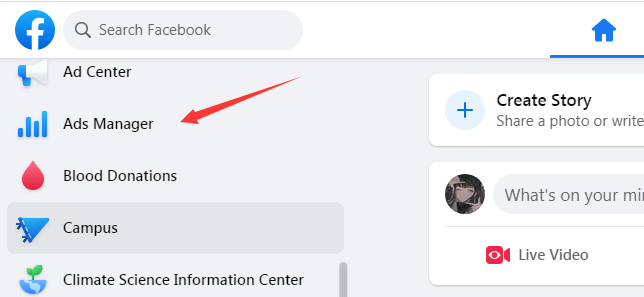
✅ Step 1: Log in to Facebook Ads Manager
Log into your Facebook Business account and navigate to the Ads Manager via the left-hand mzzzzenu.
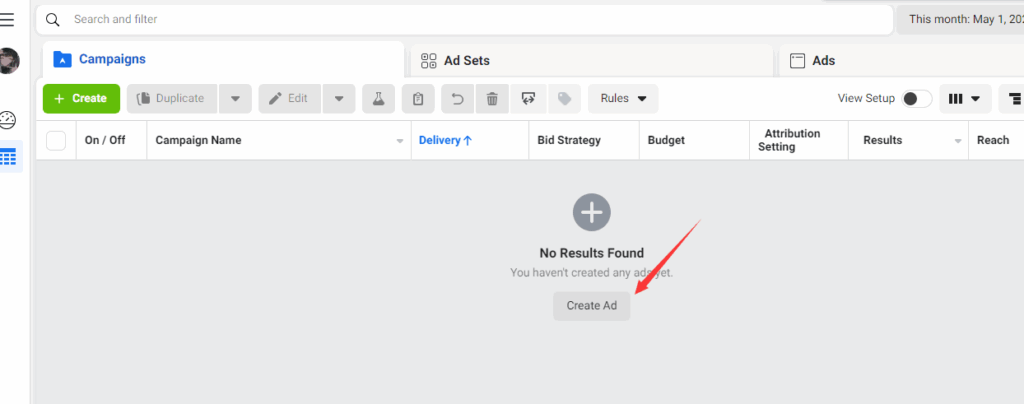
✅ Step 2: Click “Create Ad”
Once inside Ads Manager, click the “Create Ad” button to begin setting up a new campaign.
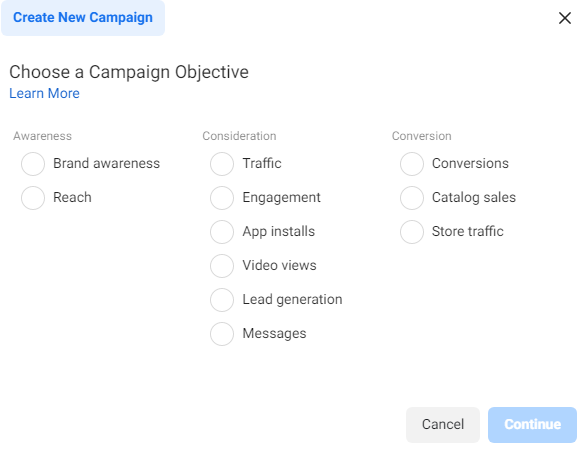
✅ Step 3: Select Your Advertising Objective
Choose the appropriate objective based on your campaign goals—whether it's brand awareness, website traffic, conversions, or lead generation.
✅ Step 4: Configure Your Ad Details
Set up your target audience, budget, delivery region, and ad creatives. Make sure all information is accurate and aligned with your campaign strategy.
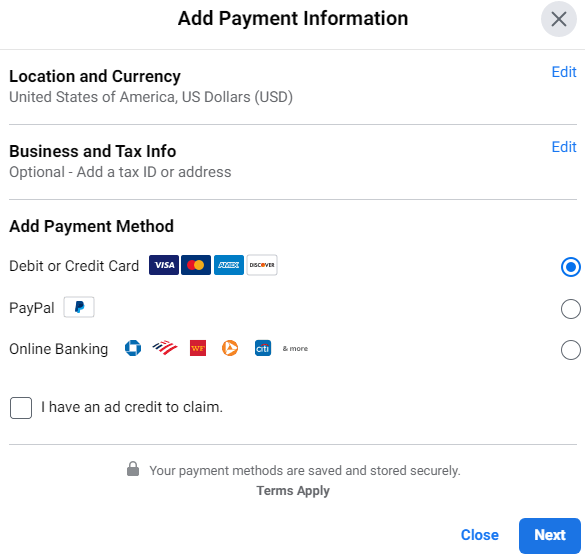
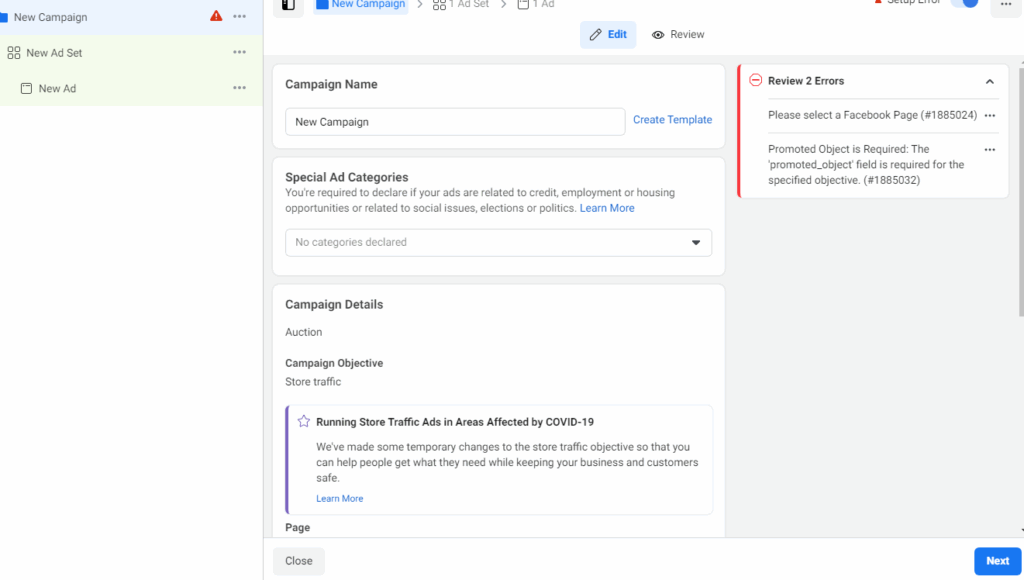
✅ Step 5: Add a Payment Method – Use Your Buvei Virtual Credit Card
During the campaign setup, you’ll be prompted to add a payment method. Choose Credit Card and use the virtual card credentials provided by Buvei.
💳 Why Choose Buvei Virtual Cards?
-
🌍 Globally Compatible – Works seamlessly with platforms like Facebook, Google, TikTok, and more
-
🔐 Privacy & Security – No exposure of real card details
-
⚡ Instant Issuance – Get your card details in minutes
-
🔄 Flexible Funding – Easily manage your ad spend with customizable balances
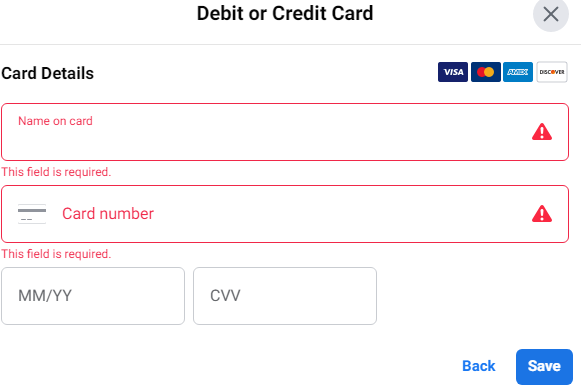
✅ Step 6: Enter Virtual Card Information
Fill in the card details provided by Buvei, including:
-
Cardholder Name
-
Card Number
-
Expiration Date
-
CVV Security Code
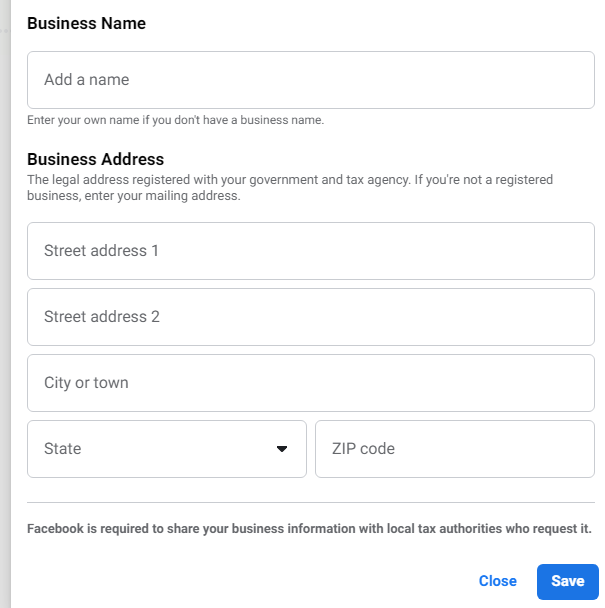
✅ Step 7: Enter the Billing Address
Input the billing address exactly as listed on your Buvei dashboard. Matching this information increases the likelihood of successful verification.
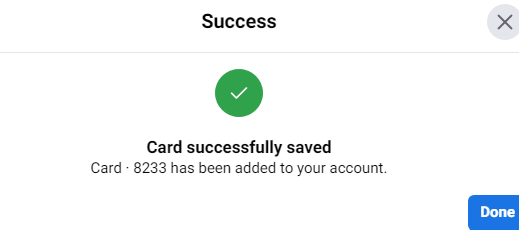
✅ Step 8: Payment Method Linked
Once Facebook validates your card, the payment method will be added successfully. You can now continue with the ad setup.

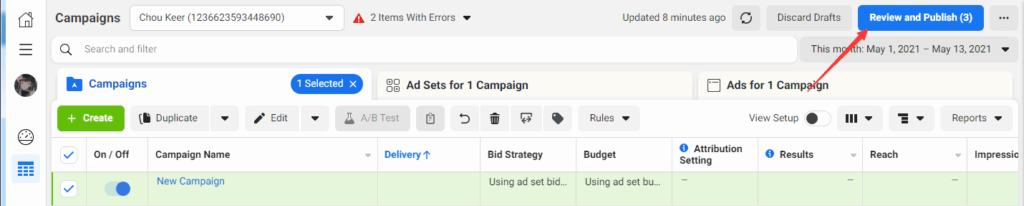
✅ Step 9: Submit Your Campaign for Review
After finalizing your ad settings, click “Review and Publish” to submit your campaign for Facebook’s review process.
✅ Step 10: Approval
Your ad will typically go through review within minutes to a few hours. Once approved, you're ready to launch.
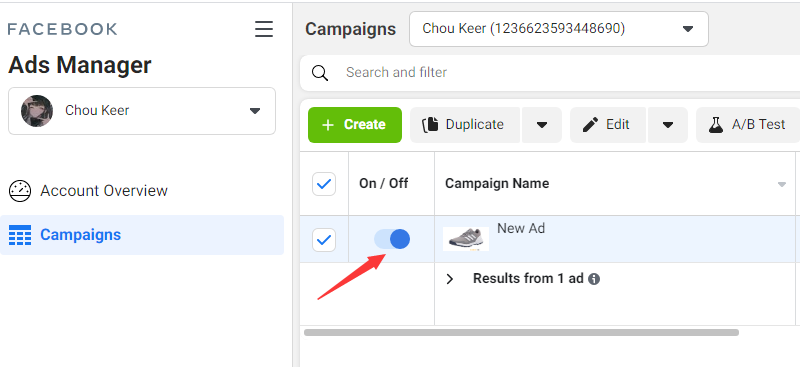
✅ Step 11: Activate Your Campaign
Flip the toggle switch to “ON” to begin your campaign and start reaching your audience.
🎯 Final Thoughts
Linking a virtual card to your Facebook Ads account is a simple but crucial step for any digital advertiser. If you run into issues with card verification or billing address mismatches, using a purpose-built virtual card provider like Buvei can make the process smoother and more reliable.
Buvei offers a payment solution tailored for global ad platforms—giving marketers control, flexibility, and enhanced security.
Getting your ad account verified is just the start. Consistent campaign management and stable funding are what drive long-term success.