Creating a cloud account without a credit card is becoming increasingly important for developers, startups, and global users. Many cloud platforms require payment verification, but using a personal credit card can create privacy, security, and budgeting risks.
This guide explains how to use a virtual card for cloud services so you can safely create and manage cloud accounts without relying on your own bank card.

Why Cloud Platforms Require Payment Methods
Most cloud providers such as AWS, Azure, and Google Cloud require a payment method during signup for three reasons:
-
To verify user identity
-
To reduce fraud and fake account creation
-
To enable automatic billing once free credits expire
Even if you only plan to use free tiers, a valid card is usually required for verification.
Problems with Using Personal Credit Cards for Cloud Services
Using your real credit card for cloud billing introduces several issues:
-
Risk of unexpected charges from misconfigured services
-
Difficulty separating personal and project expenses
-
Higher exposure if the account gets compromised
-
Hard to manage multiple cloud accounts for different projects
-
Payment failures when cards don't support international or SaaS billing
This is why many professionals prefer to use a virtual card instead of a personal card.

How Virtual Cards Enable Cloud Account Creation
A virtual card works like a normal Visa or Mastercard but gives you far more control.
With a virtual card, you can:
-
Create cloud accounts without exposing your real bank card
-
Set spending limits to avoid surprise bills
-
Use separate cards for AWS, Azure, GCP, and test environments
-
Pause or delete cards instantly if needed
-
Improve approval rates using region-matched BINs (e.g. US BIN)
For anyone managing multiple tools, services, or environments, virtual cards are a practical solution.
How to Use Buvei Virtual Cards for Cloud Billing
Buvei provides a simple system to create and manage multiple virtual cards, which makes it suitable for cloud services, SaaS tools, and recurring subscriptions.
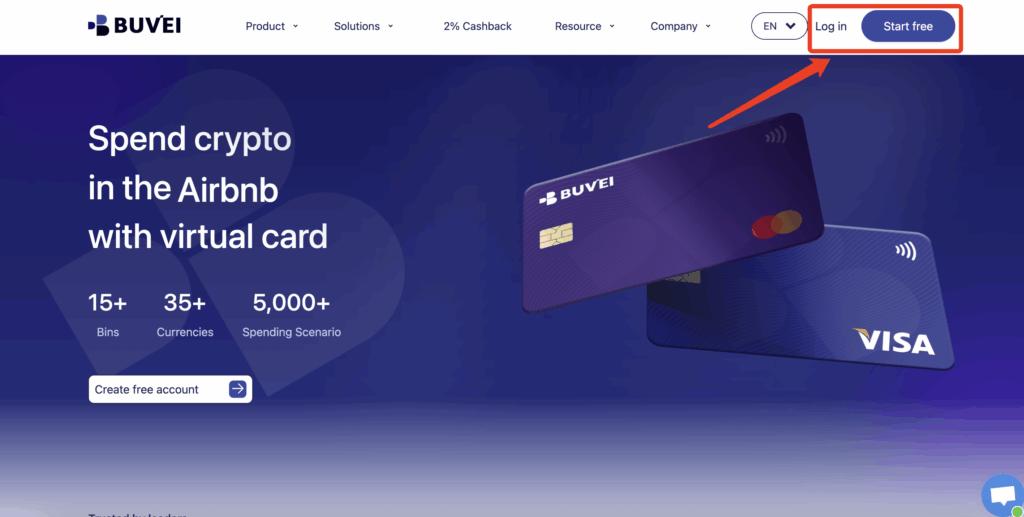
Step 1: Register a Buvei Account
Visit https://buvei.com and create a free account.
After completing email verification, log in to your Buvei dashboard.
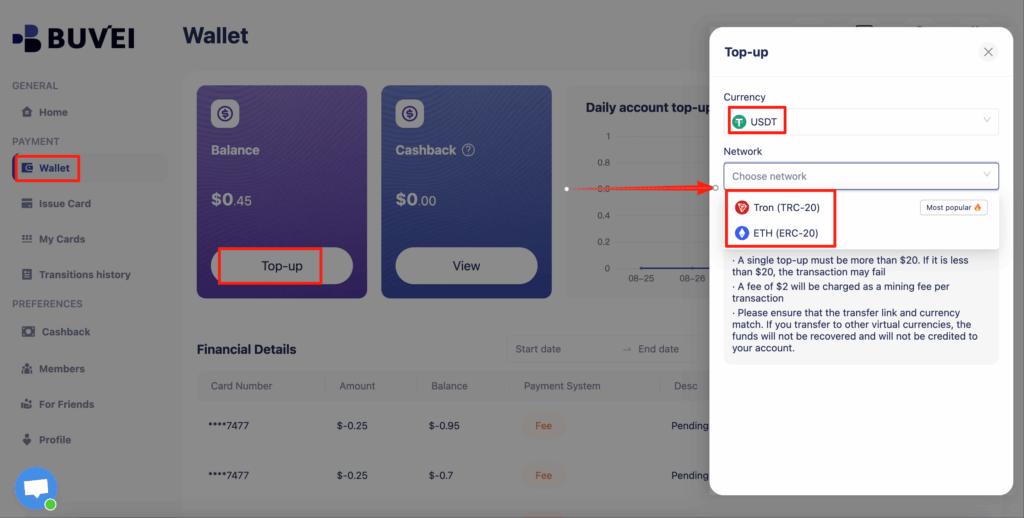
Step 2: Fund Your Account
Go to the Wallet tab.
Top up using USDT (TRC20 or ERC20).
You will receive a unique deposit address.
After confirmation, your balance will appear in your wallet and be available immediately.
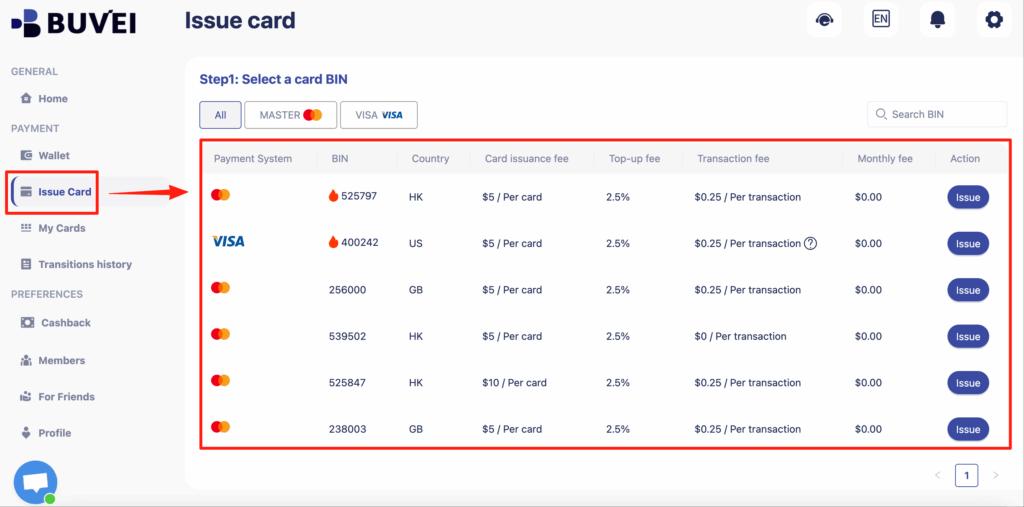
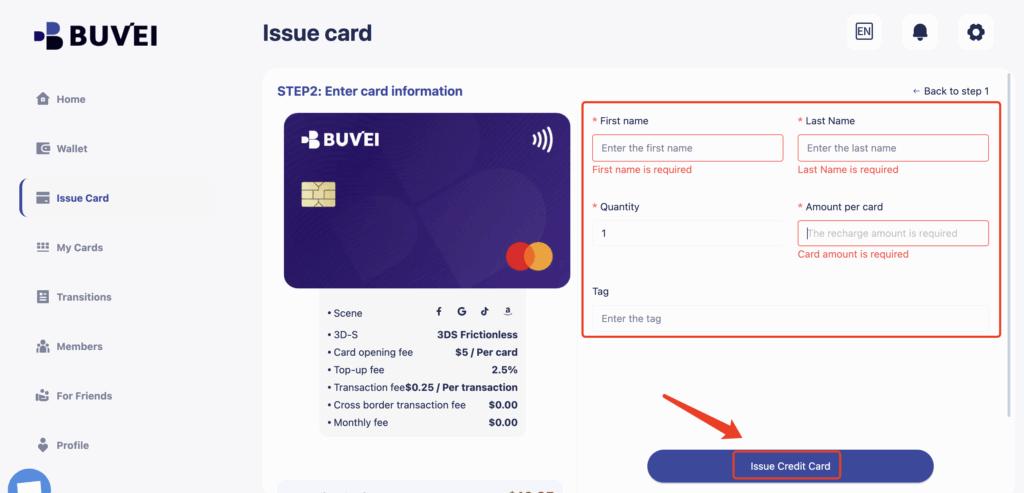
Step 3: Create a Virtual Card
Go to the Cards tab.
Choose your preferred BIN region (US BIN is recommended for higher approval rates).
Select your card type.
Click Create.
Fill in the card details, including card name, amount, and number of cards.
Click Issue Card.
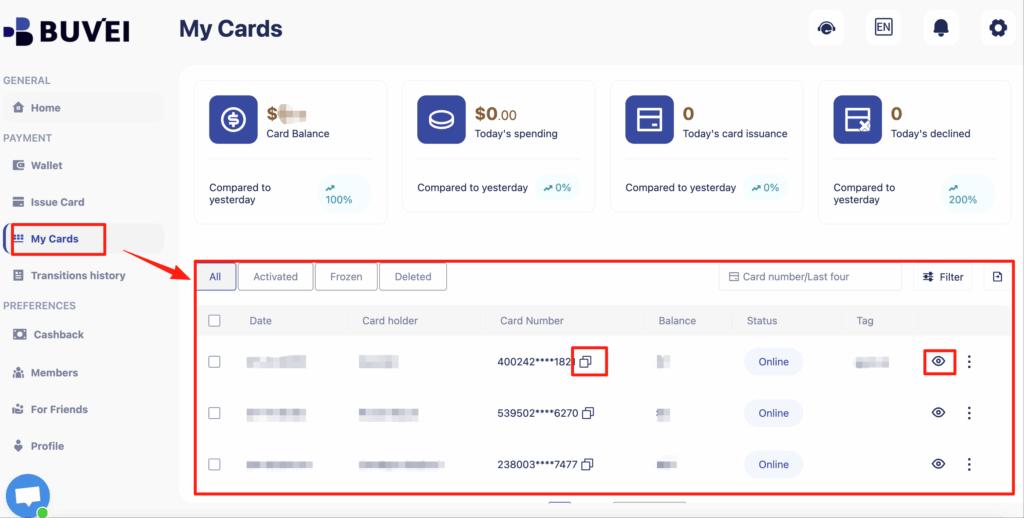
After creation, go to My Cards to view:
-
Card number
-
Expiry date
-
CVV
-
Card balance
-
Transaction history
Example Use Cases for Cloud Services
With Buvei, users commonly create separate cards for:
-
AWS account billing
-
Azure subscription verification
-
Google Cloud projects
-
AI tools and APIs
-
Testing environments
-
Client projects
This structure provides stronger isolation and far more financial control.

Managing Cloud Costs with Card Limits
One of the biggest benefits of using a virtual card for cloud services is cost protection.
Best practices include:
-
Load only the amount you are willing to spend
-
Use one card per project or client
-
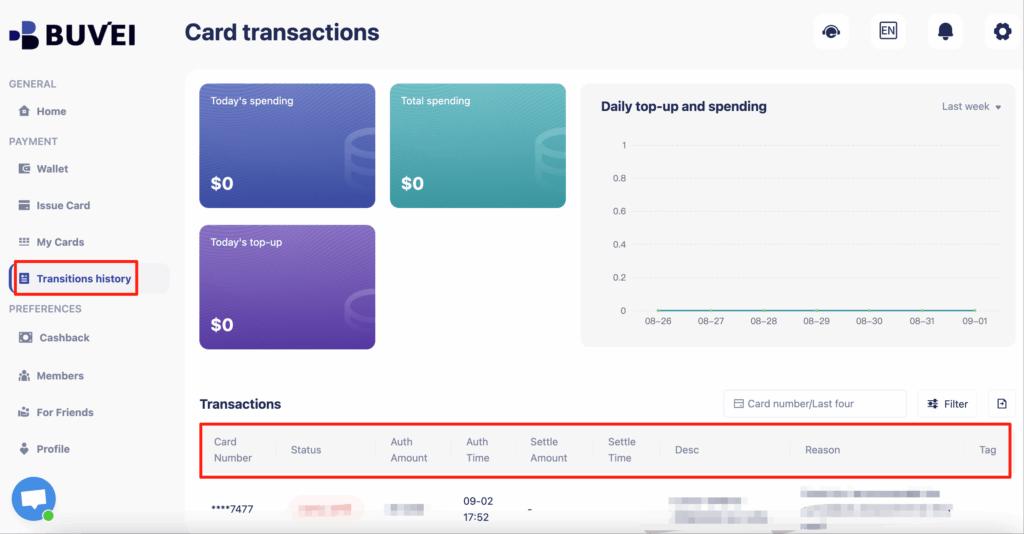
Monitor transaction history regularly
-
Replace cards when projects end
-
Avoid using one card for everything
By combining platform-side budgets with virtual card limits, you dramatically reduce the risk of unexpected cloud bills.
Final Thoughts
Creating a cloud account without a credit card is no longer difficult. With the right virtual card setup, you can access AWS, Azure, Google Cloud, and other platforms while maintaining strong control over security, privacy, and costs.
Using a structured system like Buvei makes it easier to manage multiple cloud environments, protect your funds, and scale projects safely.