
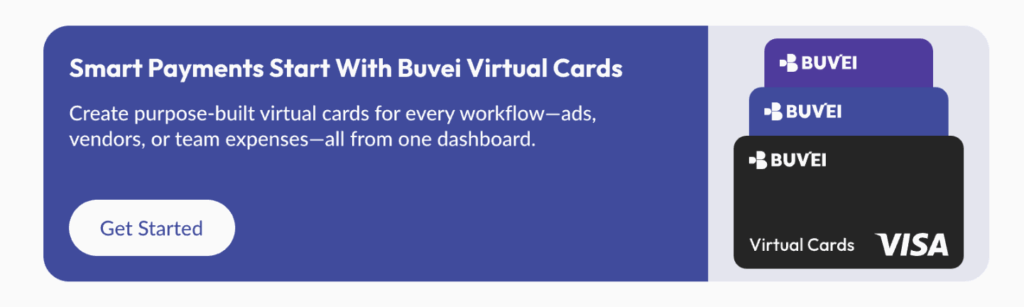
As advertising budgets scale, automated ad payments become essential. Manual top-ups slow down campaigns, introduce human error, and increase the risk of missed opportunities. More advertisers now rely on virtual cards for ad spend to build a reliable, automated payment flow that keeps campaigns running without interruption.
This guide explains why automation matters, how virtual cards support automatic ad spend replenishment, and how to set up the process step by step using Buvei.

Why Manual Ad Top-Ups Limit Campaign Performance
Many advertisers still rely on manual funding. That usually means someone is responsible for checking balances, logging into platforms, and adding funds by hand.
This creates several problems:
-
Campaigns pause when balances run out
-
Teams waste time monitoring accounts instead of optimizing performance
-
Spending becomes reactive instead of planned
-
Errors occur during rushed top-ups
In competitive ad environments, even a short downtime can disrupt learning algorithms and reduce overall performance.
The Hidden Risks of Failed or Delayed Ad Payments
Payment issues remain one of the most common operational risks in digital advertising.
Delayed or failed payments can lead to:
-
Temporary account suspensions
-
Loss of delivery during high-performing periods
-
Reduced account trust with platforms like Google or Meta
-
Disruption of automated bidding strategies
That’s why many professionals adopt virtual cards for automated ad spend — not just for convenience, but for stability.
How Virtual Cards Support Automated Ad Payments
Virtual cards make automation possible because they allow:
-
Dedicated cards per ad account
-
Controlled balances for each campaign
-
Predictable funding behavior
-
Better approval rates on major ad platforms
Instead of relying on one shared card, advertisers assign one card per account or per client. Once that structure is in place, platforms like Google Ads and Meta Ads can automatically charge the card whenever spend reaches a threshold.
This effectively creates automatic ad spend replenishment without requiring daily manual intervention.
Step-by-Step: Setting Up Automated Ad Spend Workflows
To build a stable automation system, most professionals follow a structure like this:
-
Create separate virtual cards for each ad account
-
Allocate specific budgets per card
-
Add those cards as payment methods inside ad platforms
-
Allow platforms to auto-charge when balances drop
-
Monitor transactions centrally
The system works best when your virtual card provider supports multi-card management, fast funding, and reliable compatibility with ad platforms.
This is where platforms like Buvei are commonly used in real-world workflows.
How to Configure Buvei Virtual Cards for Auto-Recharge
Below is a practical walkthrough using Buvei as the example platform.
Step 1: Register a Buvei Account
-
Visit https://buvei.com
-
Create a free account
-
Verify your email
-
Log in to access your dashboard
The setup is designed to be fast, allowing users to begin within minutes.
Step 2: Fund Your Account Using USDT
To support ongoing ad spend, your account must hold available balance.
-
Go to the Wallet tab
-
Select USDT (TRC20 or ERC20)
-
A unique deposit address will be generated
-
Copy the address and send funds
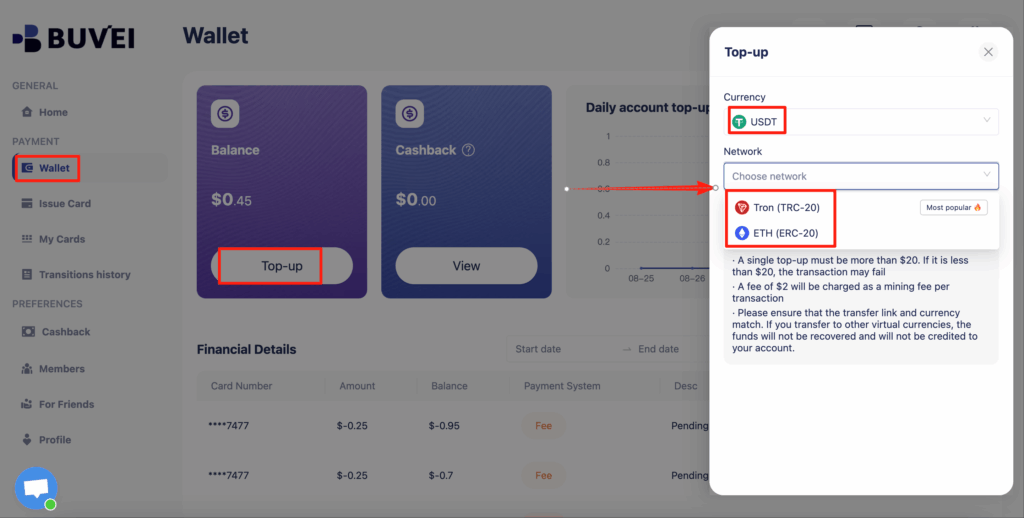
Once confirmed, your balance becomes immediately available. Many advertisers prefer this method due to faster settlement and lower fees compared to traditional banking.
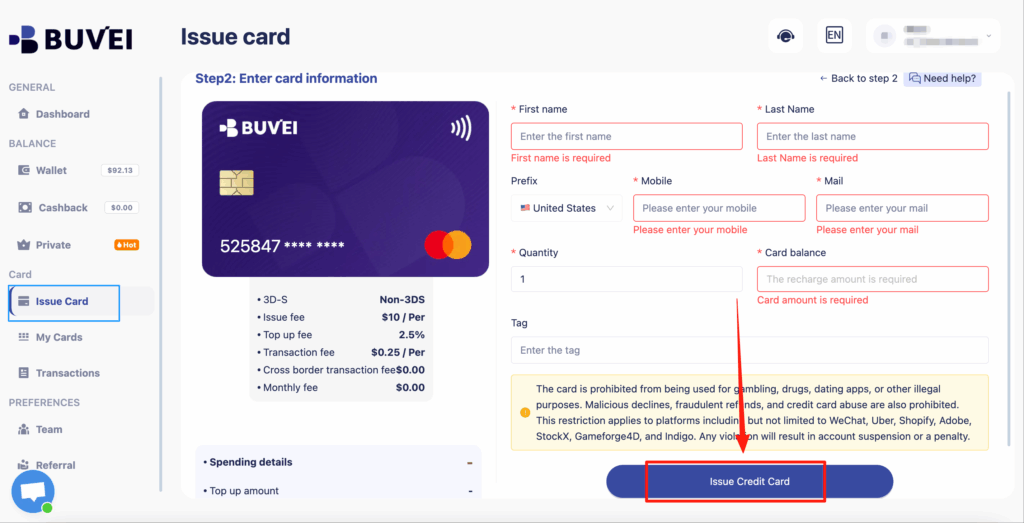
Step 3: Create Dedicated Virtual Cards for Each Ad Account
Next, issue cards that will be linked to your ad platforms.
-
Go to the Cards tab
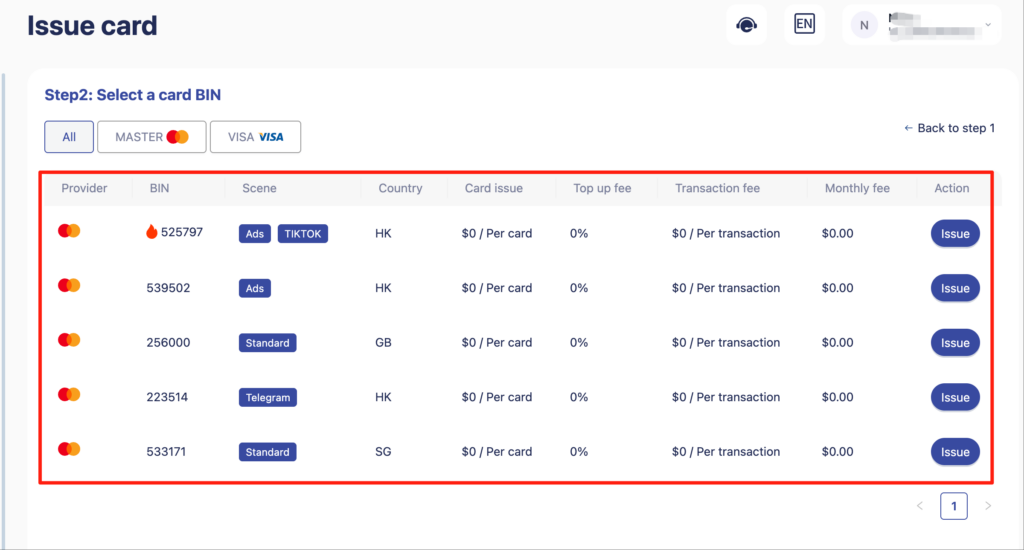
-
Select your preferred BIN region (US BIN is often recommended for ad compatibility)
-
Choose card type
-
Click Issue Card
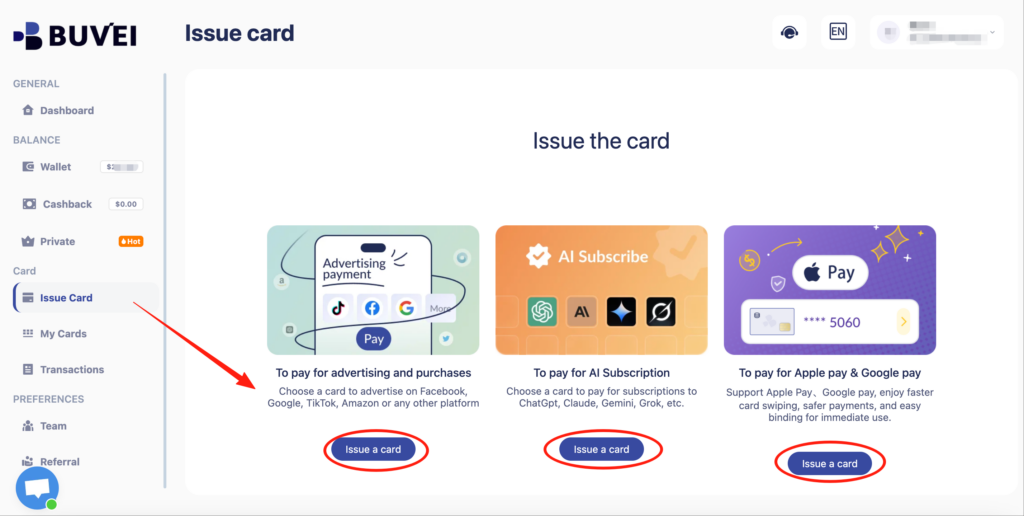
-
Fill in details:
-
Card name (e.g., Google Ads – Client A)
-
Amount
-
Card quantity
-
-
Click Create Card
After issuing, visit My Cards to view:
-
Card number
-
Expiration date
-
CVV
-
Transaction history
-
Top-up and spending overview
Each card can now be assigned to a specific ad account.
Step 4: Enable Auto-Charge Inside Your Ad Platform
Once the virtual card is created, add it to your ad account:
-
Google Ads → Billing → Payment methods
-
Meta Ads → Payments → Add payment method
-
TikTok Ads → Finance → Payment settings
Most platforms automatically charge the card when spend reaches a billing threshold. This effectively enables automated ad payments without requiring daily manual top-ups.

Best Practices for Stable Ad Scaling with Virtual Cards
Advertisers who successfully scale campaigns using virtual cards tend to follow a few consistent practices:
-
Use one card per ad account
-
Clearly name each card based on its purpose
-
Allocate realistic budgets per card
-
Monitor transactions weekly
-
Avoid mixing multiple clients on a single card
-
Use reliable BIN regions for higher approval rates
This structure improves not only automation but also operational clarity as campaigns grow.
Final Thoughts on Using Virtual Cards for Automated Ad Spend
The shift toward virtual cards for ad spend reflects how professional advertisers now operate. Automation is no longer optional — it’s a foundational layer for scaling reliably.
By combining dedicated virtual cards, structured budgets, and platform-level auto-charging, advertisers can reduce downtime, prevent payment failures, and keep campaigns running smoothly. Buvei’s ability to issue multiple cards quickly, support USDT funding, and provide centralized card management makes it a practical tool for teams building long-term automated ad payment systems.